Tuesday, October 7, 2014

Knitting and reading

       Still working on my Through the Woods hood... but getting close! I may even get to finish today, due to some unforseen me time, gifted me by a friend. Kiddo is going to see a production of Stuart Little while I drive Eldest to class... the time she's in class is usually dedicated to movement and reading practice with Younger.  I love knitting in this chunky yarn. It's Bare Swish Bulky, plant dyed in weld, cosmo, mullein (all yellows) and overdyed with indigo.
       Working on book 8 of the Outlander series. I'm so in love with the characters and story, that I'm pretty sure I'll start over as soon as I'm finished.
        What are you knitting and reading? Please share a link in the comments, below!

Wednesday, October 1, 2014

We got the Blues....

We had a lovely plant dying day with some of our lovely Waldorf homeschool co-op friends, on Monday. One of my contributions was an indigo vat.  Having a bit of experience with natural dying, but none with the complex process of bringing an indigo vat into being, from scratch, I bought this kit for the third time. It is pre reduced and very easy to use. Someday, I hope to learn the entire process, but it's nice to be able to experience and share the magic of indigo in the mean time!  After our dying day (during which my camera battery remained plugged into the wall at home.. super bummer) the indigo vat was not exhausted. Inspired by a section of this book, Little and I decided to faux batik some plain white linen napkins we had our cloth napkin stash. First, we applied blue gel school glue to create a resist in the corner of each napkin. We settled on a simple design for each family member, with a few fun extras thrown in.

We let the glue dry completely, then quickly dampened the napkins in water. We wrung them out, one at a time, being sure to squeeze out all of the air (you don't want to intruduce oxygen into the vat, as the dye process in an oxidation process. Adding oxygen caused the vat to exhaust faster. I need to learn more about the chemistry!)
Then, we slowly, gently lower the cloth into the vat, being careful not to agitate (thus introducing air/oxygen) ... slowly open it up beneath the surface to be sure to saturate, then bring to the side and squeeze out excess as you raise it out... again, careful not to create bubbles and disturbance)

As you can see, when the cloth comes out of the bath, it is yellowy green.... as it is opened to the air and begins to develop, it changes, dramatically. Quite magical to watch!

Napkins in different stages of development.. the frontmost being the first to go into/come out of the vat

We let them process for a good long while, then rinsed in cool water. Threw the whole bunch in the washer to get the water soluble glue out.....
Et Voila!! We got the blues! New, blue linen napkins, mostly to make snacktime/tea time for the youngest and friends more fun, but fun for all, I am sure.


Monday, August 18, 2014

Elderberry Days

We've been spending a lot of time with the elderberry bushes in our garden


After gathering and separating a few quarts of berries, we got down to work/play!
First, we made Elderberry syrup, intending to boost immune systems coming into the school year and winter sickies season. It's so good, we've given it as gifts, served it over vanilla ice cream, made soda with seltzer water (as well as a couple of REALLY yummy coctails. Elderberry peach gin fizz and Prosecco with elderberry syrup and fresh mint) 

To make the syrup, we brought 2 cups of berries to a boil in 2 cups of water. After boiling point was reached, we turned off the heat and mashed the berries. We let them steep for a couple of hours, then strained them through a fine mesh strainer. I would have liked to use cheesecloth, but was out.  Then we mixed in 2 cups of raw, local honey. Poured off into mason jars, and voila! I understand it keeps in the fridge for one to two months (though I guarantee it won't last that long! In fact, I just ordered more raw honey from our farmer to make another batch before the catbirds and mockingbirds clean out the bushes!)


I got direction for the syrup from the elderberry  issue of herbal roots zine, which is included in our herb fairies subscription. The magazine is loaded with info, games, stories, recipes and crafts to get to know each herb, as well as journal and coloring pages and resources for further exploration.  The herb fairies stories are a big hit with my girl, and she's learned a lot, listening to them during our after lunch quiet time.
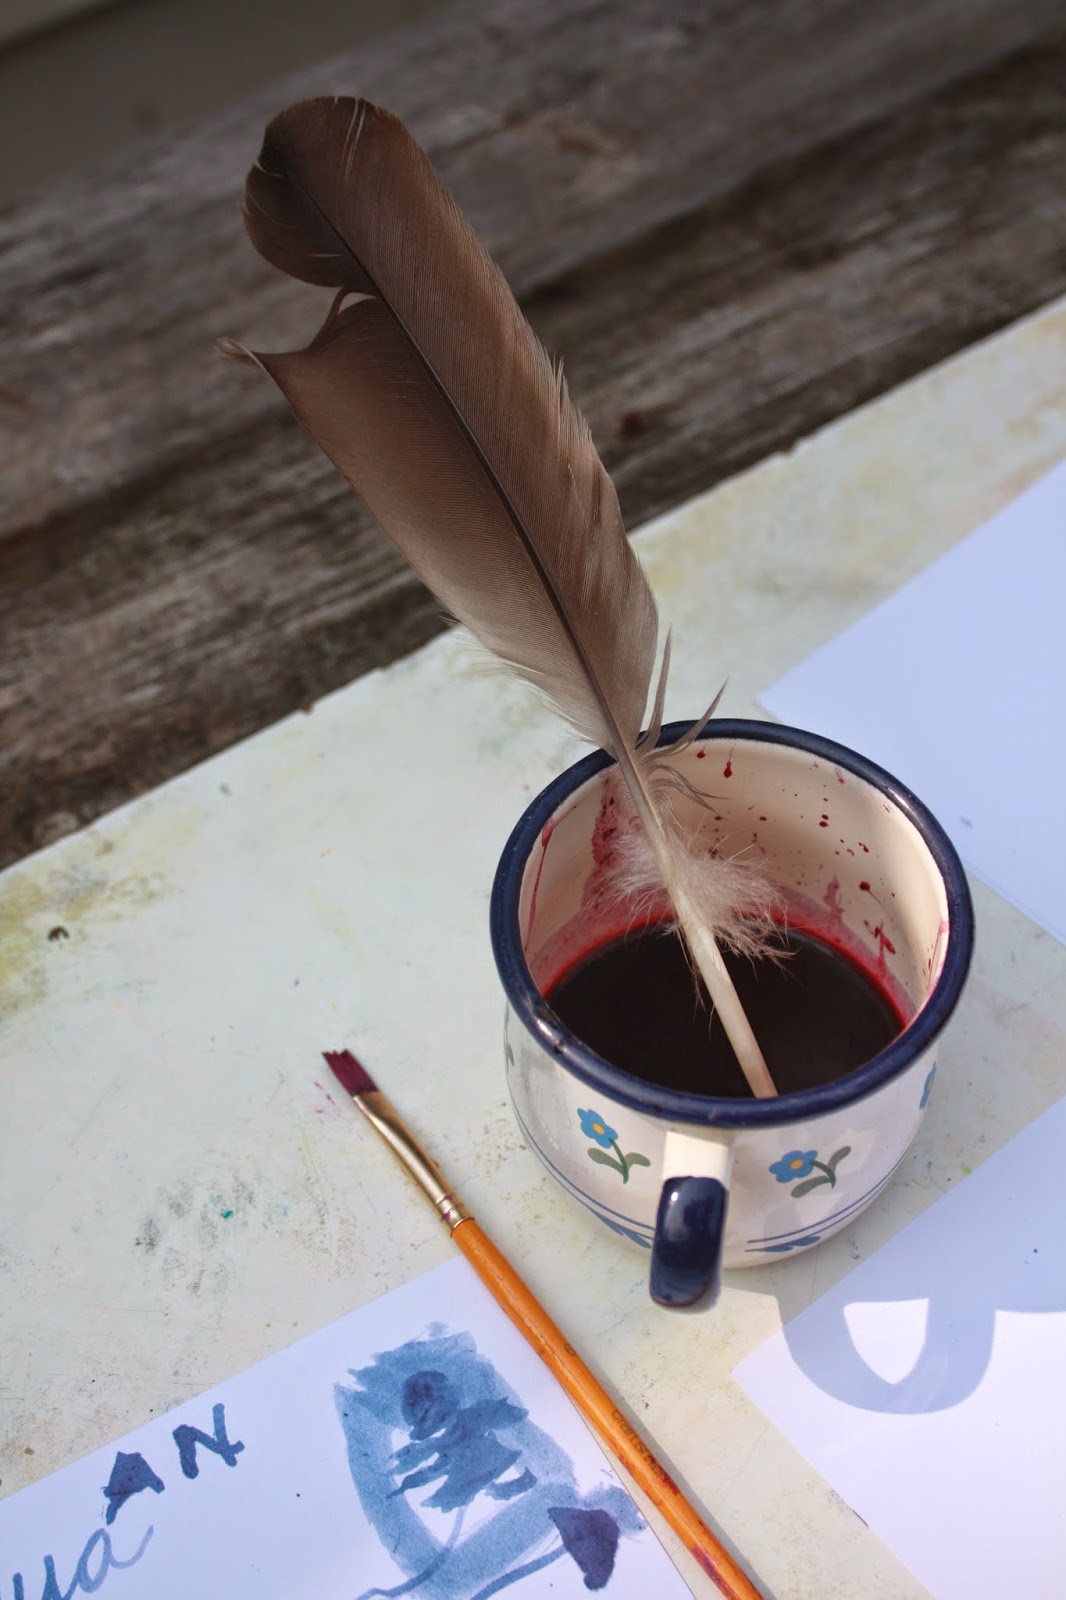
Then we made elderberry ink (mashed, strained berries, salt, and vinegar)


Nature journaling, more cooking (grain free peach elderberry crisp, YUM!), elderberry flute crafting and dyeing yarn and a play silk rounded out our week with elderberry. 
She strained off our fermented elderberry dye. We filled the jar with berries, covered with water, and let sit in the sun for 3 days. After straining, we added some alum mordant and a skein of wool yarn, along with a playsilk.


We were very happy with the results, though we put the yarn back in the jar for 24 hours to deepen the color


cutting a length of elder branch for a flute

hollowing out the branch with a drill bit. The flute ended up cracking after a lot of work, but we will eventually try again

Elderberry syrup on vanilla ice cream with fresh peaches, borage, and nasturtium flowers. Perfection in a bowl.
Can't wait for elderberry season next year!

Tuesday, June 10, 2014

Wet felted flower headband (or pin, barette, bracelet.....)

Anya and I finally made time to do a project I've been looking forward to. We wet felted a flower (the intention was to make dandelions, two of them, for hair ties to end her double braids... but as they often do if you allow the space for it, our project morphed and created itself). In the end, we made a sunflower/zinnia esque flower with heart shaped leaves and a curly vine.. an imaginary flower, but a lovely one!

I didn't take as many photos as I would have liked of the process (super soapy, wet hands and the camera don't mix!) , but will attempt to provide a tutorial, of sorts.


l

We started with carded wool. Carding is basically brushing the wool so  the fibers are aligned, usually to prepare for spinning. In order to felt, the fibers need to lock together, so we place thin layers of wool on top of each other, with the fibers of each layer running purpendicular to the layer beneath.  For this flower, we used about a 3X3  inch piece of roving, and layered 3 layers deep. On the top (you could do all of it, but lower layers are not so visible) we added in some wisps of accent colors, in a ray pattern. If you do this, go light and wispy... it will thicken up and be more pronounce as it felts and shrinks. So, to begin, place 
your 3X3 layer (ours started out quite square) on your felting surface. We used bubble wrap (bamboo sushi mats also work beautifully)  on a cookie sheet and plastic  tray, with a towel under the whole thing. This is a  GREAT project to do OUTSIDE! 
Build up a few (3 or 4) thin layers of wool, adding accents as you like. Then, SPRINKLE (we used our fingers, dipped in a bowl) of hot (as hot as you can stand, really) soapy water onto the layers of roving. If you pour the water, the fibers will get displaced. As for the soap, some prefer certain brands of dishsoap. I use whatever I have on hand. Let me know in the comments if you prefer a certain type/have had more success with one. I am learning as I go! A hefty shot of soap is necessary. We used a bit too much, and required a lot of rinsing.
my  layers in the foreground, kiddo arranging her fiber in the back
Gently sprinkling water.. then lightly pat down to flatten/soak through the whole thing

Gently felting, in the beginning. Tap with fingers and pat with whole hands, until the fibers begin to felt. All the while, sprinkling hot soapy water as needed. The heat, friction, and soap are the three  elements that cause the fibers to felt, so keep that water hot, and keep adding it to the wool. I had to pour off the excess from the trays, a few times. (did I mention that this a great OUTDOOR project??)  you can shape it  a bit as you go, folding the edges in,  even gently pulling it into more of a circular shape as it felts a bit more. Once it's really begun to felt, you can roll it up, burrito style (hit it again with hot, soapy water)  , in the bubble wrap or sushi mat. Then, as the fibers are   really held in place, you can go to town sqeezing, massaging, and rolling.... don't be afraid to use vigorous motion... it really helps the process. Unroll,  and turn the other  direction  to felt in the hoizontal  as well as vertical plane.
 

Now,  the whole piece should be a bit shrunken and fairly firmly felted together. At this point, you can lay it flat on the bubble wrap, and rub intensly with your hands. The nubs on the wrap help in the felting process. I even dipped the whole thing in my hot bowl of water, wadded it up in my hands, and rolled and squeezed. When you're happy with the shape and density, rinse, lay flat to dry, and make two more rounds (don't worry if they're squarish... especially if you plan to cut petals)  If you want a more rounded shape,  gently stretch the edges into shape while still wet.


Making the felt for the leaves is the same process. Just make a piece big enough to accomodate the shape/number of leaves you'd like your flower to have. To make a stem/vine, pull out a long, thin piece of roving.  Wet with soapy hot water, and gently squeeze down the length of it to begin felting. Once it's started to hold together, you can roll it vigorously between your palms until it's quite firm. If you want it to be curly, rinse, and wrap around  a thin cylinder(we use a paint  brush handle) . Holding it in place helps, as it needs to dry completely while wrapped to hold the curl. I grabbed playstand clips, because they were close by, but clothespins would be good, too.

Once dry, you can cut out your leaf shapes  and cut petals. My petals came out really wonky, but the end product was still nice. Just cutting slits in a ray pattern didn't work very well... shaping petals and removing a bit of material in between was a bit better. (I hated wasting a bit of that felt, though!  We saved the scraps for scrap jewelery, later.

The next step is to arrange your layers, leaves, vine/stem and stitch them together. We added a little lightly felted ball of wool to form the center of the flower. 

Then, stitch to a headband, barrette, or pin, et voila!  A lovely felted accessory.  If anyone has questions, feel free to ask in comments.

Sunday, May 25, 2014

Dyeing day at Feederbrook Farm

We returned to the lovely Feederbrook farm for our last session of our fiber CSA.  We received the fiber from our sheep (we chose roving, yarn was also an option, spun at the local mill) and did a hand painting workshop with the fabulous Lisa. It was so much fun, and I'm really excited to have new skills and techniques under my belt!

A sweet, tiny little bottle baby lambie, just a few days old

Add caption

Some roving and yarn, dyed by Lisa. The bags contain the roving and yarn from the sheep, chosen by program participants

The children learned about the effects of dye applied to different colors of yarn, as well as overdyeing, before they made their color selections


Add caption

So many possiblities! They got to choose 3-5 colors for their skein

Mordanting the fiber with citric acid

Squeezing out the mordant

Laying out the yarn for dye application

Purple first, of course!

Squeezing the dye well into the fiber

After some time spent on the stove, it comes off, having absorbed and set the dye

A good rinse......

The gorgeous results of everyone's creative work

The girl and her skein

Anya's skein on the left, mine on the right. I forced myself to use colors I wouldn't normally choose (as in greens and browns)

A small swatch of my yarn. The colors, in person, remind me of raspberries and chocolate.

We have so enjoyed our monthly visits to the farm! We wrapped up the day with some mucking out of the alpaca shelter, bringing home 2 big bags of manure for the gardens. I eagerly anticipate scheduling a spinning class with Lisa, to learn to use my beautiful wheel, gifted me earlier this year.